Insert Alt Twitter Facebook Instagram Pinterest
Showing posts with label project. Show all posts

Sunday, July 20, 2014

Home Statement Piece

Back at the beginning of this year, I envisioned creating a "statement piece" for our home.

Not only did I want it to be(come) a large focal point to be mounted on the wall... the piece was literally a statement.

I ordered the lettering off of etsy back in February and just 2 weeks ago finally created it.

The statement is the last part of what Troy and I vowed to one another on our wedding day.

I imagine this forever being on the wall(s) of our home(s).

Here we are at Lowe's trying to figure out the spacing.
The lumber guy that was helping us was super patient ;)


I stained the wood using this stain gel.


After the gel had completely absorbed and dried, I added the letters.
Dad put all the planks together.
Troy added the wire hanging kit.


FINALLY I have the piece I envisioned over 6 months ago!

I pray that these words will forever be at the center and serve as the foundation of our marriage and life together.

Wednesday, July 24, 2013

Family Yearbook

A while ago I saw a pin on Pinterest about making "yearbooks" for your family each year. I loved the idea and started creating one this past January to document our 2012. (Well, really only May to December because that's the part of the year we were married.) But then I never finished it… so last month I decided to work on it again. And this time, I finished!

I especially love the idea because I hardly ever actually develop pictures. This way, I can have a hard copy of some pictures that are all condensed in a book, separated by year. I hope I continue this tradition in years to come!

Anywho, I used MyPublisher which had been recommended to me and I am pleased with the book. I ended up getting 40% off with a coupon code which made it even better!

Here is the front cover of our book :)


I really like the 'photo finish' covers (like the one of the bride/groom and football players below) more than the linen--which is what we got, but I wanted the front of the book to be a wedding picture (since it was 'The Year of The Wedding' after all) but for some reason it wouldn't let me access the folder where all our wedding pictures are stored. So I had to use one by saving it from Facebook, which obviously made it lose quality, so the resolution wasn't good enough to be a 'photo finish' cover… if that makes sense at all!


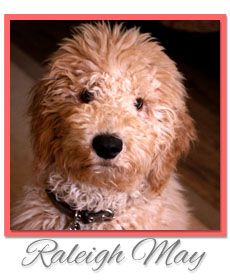
Next year, I'll do the 'photo finish' (with a picture of Raleigh (I think that's what we're going to call her) because 2013 will be 'The Year of The Doodle'… God willing!!!) :)

Here is our "married portion" of 2012… 

well technically we weren't married in this picture… it was the night before!


There are LOTS of honeymoon pictures!
It was definitely one of the highlights of the year!


Can't wait to make our 2013 Family Yearbook… I know we'll have lots of great pictures to include!

Monday, August 20, 2012

It's (almost) Football Time in Tennessee!

Can you believe that football season is about to start up?!

I've seen preseason games on ESPN and according to my calendar, its right around 3 weeks until UT's first game! That seems so crazy-- can't believe its already that time again!

I do enjoy football season, not only because of the games to be watched, but because of the other things associated with football season. Colder weather, fall clothes, tailgates, good food, and how beautiful Tennessee gets with the changing of the season.

Football season is not quite the same being out of high school and out of college. It kills Troy to not be playing after playing for sooo many years at all age levels. We hope to make it to Knoxville for at least a game this season (add 3 more hours to the drive there, holy cow!) and I'm sure well make it to a Friday night game at good ole HHS. We'd also love to see Lawson's middle school team play, the only problem is they play during the week and we probably will never be in H'ville mid-week.

I've seen in different stores and shoppes these burlap football door hangars for front doors. I think they are SO cute and decided to make my own in preparation for the football season. I got my inspiration from this site.

Things you need:
  • about a yard of burlap (I got mine from Hobby Lobby $3.99/yd with a 40% off printed coupon)
  • wax paper to make template for football cut out, unless you want to freehand!
  • plastic bags (I used Kroger/TJ Maxx bags, probably 6 total)
  • stapler with staples
  • jewelry wire (The larger the gauge the better. The site suggests 12 gauge, Hobby Lobby's largest was 18 so thats what I got. I think it turned out fine but I could see how 12 gauge might have worked better! It was $2.99 for the spool and I used a 40% off printed coupon. You can use a coupon every visit, so I just went back at another time to use the 2nd coupon for this wire)
  • thin floral wire (I got from Wal-Mart for $2)
  • ribbon of choice (I got white ribbon for mine from Wal-Mart for about $4)
  • acrylic paints (I got from Wal-Mart ranging from about $1-2 each)
  • bottle squeeze paint (I got mine from Wal-Mart for $.97)

First step, I pinned the burlap together with straight pins so it would stay together and even while I cut the burlap.


I took wax paper and made my template (fold the wax paper in half so as you cut it, its even on both sides)


I pinned the half-football template to the burlap so it'd stay in place and I could make a straight and even cut.


Once I had completed cutting the first part of the football, I mirrored the template to complete the full football shape.


I pinned this down as well.


There's the complete football shape!


Next, take your stapler and staple around the football. I took my staples about 1 inch in and about 1 inch apart from each another.


Keep stapling until you have a gap large enough for you to stuff the plastic bags inside to give the football depth.


I used Kroger and TJ Maxx bags mainly because of their color--more of a beige color rather than stark white grocery bags. I also folded them in a way where less of the print on the bag was showing. You don't want to be able to see the print through the loose weave of the burlap.


One thing that I really liked about the example from the website was that she made it have a more rustic and "imperfect" feel. I wanted the edges of my football to be really frayed so I took scissors and roughed up the edges.


Alright, the football is completely stuffed, stapled up, and frayed around the edges… time to paint!


(The only reason I did this project underneath these terrible pink towels was for when it was time to paint. We use these towels to wash the cars and apparently for painting projects, but nothing else, promise, haha!)


My personal touch: Once I finished with the UT side and let it complete dry, I flipped the football over to make a Cowboys side. Since I'm a UT football fan and Troy is a Dallas Cowboys football fan, I thought we could represent both of our teams on the weekends. On Saturdays, when Big Orange is playing, our front door will read "Go Vols" and on Sundays (and any other days) the Cowboys are playing, our front door will have The Boy's star. (Pictures of the Dallas side below)

Once all the paint has dried take your wire and from back to front, thread it through and make "curly-cue's" to finish it off.

The example added a bow on the burlap football, but since mine was double-sided I knew I wouldn't be able to do that without it looking goofy from the opposite side. So I decided to make a bow with white ribbon (universal) and just attach it to the actual door hanger. So no matter which side I have the football flipped to, the bow will still show up top! 


And the finished product:

the Dallas Cowboys


and the Tennessee Volunteers!


So, I guess my title should actually read, "It's (almost) Football Time in Tennessee and Texas!" ;)


Wednesday, February 22, 2012

Yet another

Yup... yet another Pinterest post. Sorry I'm not sorry.

I literally do not know where I'd get half of my inspiration for wedding details. I was introduced to the addicting site at the perfect time.

Yet another project... my inspiration:
My version:
the supplies--
2 framed pictures (I ended up using 3 to be able to display more pictures)
twine
craft clothespins
glue gun and glue sticks
pictures of us :)
and here is the finished product:
Thought it'd be cute to have these on display at the reception.

Les, I found a white pitcher/vase!
My inspiration:
My version with babies breath flowers
And one more Pinterest product... Chicken Pillows!

These were so yummy and so easy. Here are the ingredients you'll need:

 First combine and stir softened butter and cream cheese. Then add in the cooked chicken. Stir.
Lay crescent rolls on cookie sheet. Put spoonfuls of chicken mixture in crescents and roll up, covering all the mixture with the roll.
Next take the "pillows" and dip them in the egg/water mixture. After the egg mixture/dip them in crushed crackers.
Put in oven and bake according to crescent rolls.

While these babies are in the oven, on stovetop combine a can of cream of chicken and milk (the amount of  milk depends on the consistency you want). When the crescents start browning, take them out, and drizzle the sauce on top.

Super easy and really good. (and cheap!!) My only complaints: the recipe makes enough of the chicken mixture to probably fill 2 cans of crescent rolls. I had so much left over! I guess you could freeze the mixture and then easily make it again the next week. Also, I didn't particularly care much for the cream of chicken/milk sauce. I thought they were good without the sauce. The recipe also suggested to serve with sour cream and cheese. Again, I thought they were good without all the extras. Fewer calories, right?

xoxo